27 October 2010

I DIY: Tu-tu-tu-tu-tu-tu

The I DIY is back! After my cousin had her unbelieveably adorable baby, and showed off her cute Halloween onesie, I knew I needed to make her a tutu. However, I had never actually attempted such a thing before, so it was an adventure all in itself.

I did a little bit of research (otherwise known as googling "tutu diy", "how do i make a tutu?" and "tutu or tu-tu?") but was still unsure of the best method of tutu creation. (I did find that tutu is preferable to tu-tu.) The most common version was the tied tutu, like here by Mammalicious, in which you merely tie tulle onto an elastic band and then slip it on. Though I appreciated the simplicity of this idea, I was really aiming for something a little more... authentic looking.

I didn't find a whole lot of gathered tutu tutorials online, so when I went to the local fabric shop to buy the tulle (My Joann's got snowed in last year. Sad face.) I asked the lady who cut my fabric how she would go about it.

Nice Fabric Cutting Lady: You're just going to gather it, right?
Me: Oh... Um... yeah!?
Nice Fabric Cutting Lady: Right. How much did you want?

So it was a foregone conclusion then. I went home with my nice black stretch tulle and got to work.
Here is how I did it, and I apologize for the lack of photos! After folding my (already doubled) tulle in half, I sewed a straight stitch along the length to gather it with, and gathered it by hand. I'll try and post a video of my method for gathering.

After I had all my fabric gathered up into cute and even ruffles, I sewed just above my initial straight stitch to hold the ruffles in place and then snipped the folds at the bottom of the skirt. Done!? Not quite. Since my sweet baby cousin is pretty tiny, I decided to shorten the tutu so it wouldn't look like she was hiding under a blanket made of tulle.

Now it's short and cute and -- well, not so fluffy like a tutu should be. Since I didn't know any other way to fix it, I decided to cut a few zig-zags in the top layer and about halfway down. I would guess I had six or eight layers. It still was laying rather flat, so I sewed a straight stitch to hold up the top two. At first, this seemed like a horrible mistake, since they stood straight up, but once patted down, they were perfectly fluffed! I did the same thing for a couple layers near the bottom.

Fluffed and chopped, all that remained was the elastic. I merely guessed at my little cousin's size, snipped and then sewed a button and cut a button hole into the ends. Done.

Here's my finished work!

It's not my best photographic work -- can you believe my roommates weren't interested in modeling?

Good news? My cousin loved it. Her sweet daughter? Halloween isn't here yet!

Any fun projects? How about any sweet babies you are crafting for? I can't help it.

26 October 2010

Halloween 2010: Wrapped Wreath

Back for more? Sick people, you readers. Welcome to the club!

Today I wanted to share with you a cute idea for your front door this spooky season. I've seen hundreds of ideas for wreaths for every season and for no season at all, so unfortunately I can't give credit to any one source. However, I'll link to a few similar ideas at the bottom, just in case you want some other options!

Spooky Ribbon Wreath!

First your materials:

1 straw wreath (mine came from michael's)
20 yards of 1 1/2 inch ribbon (i used satin in two colors!)
+ another 5 yards ribbon (i used sheer black)
glue
patience (you might run out...)

Step 1: Attach your ribbon to the wreath.


Step 2: Wrap the ribbon around your wreath slowly, securing with glue if you think it's necessary. (If you are using two colors, like me, leave a ribbon's width between each wrap, then come back and fill it with your other color.)
I also stapled mine, thinking it would work, but I just used a regular paper stapler and it fell out after a few minutes. A nice thought, though.


Step 3: Tie a sheer ribbon in a long loop around your wreath, and hang it up! Ours will soon be hanging on the front door here, and then traveling home to do the same. :)


Easy, right?
Hopefully that will give you enough information to jump right in. I still haven't hung my on the door. Maybe I'll go do it right now!
Any fun last minute projects for me? We're almost there!

18 October 2010

Halloween 2010: Spooky Scenery

Since the date is fast approaching (and my fete will actually take place the day before), I have my nose to the grindstone for the decoration portion of this hoedown. (Did that sentence mix metaphors? I'm not sure.)

After rounding up some ideas for you all, I've narrowed down the things that I would like to put into practice at my party. First, let me share some purchased items:


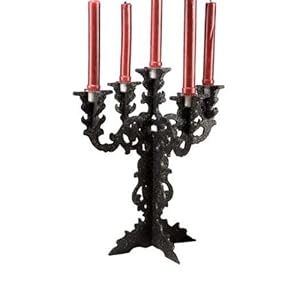
At my local Savers, I picked up this fun glittery candelabra (and for less than you can get it new on Amazon! Ha!):
And these creepy handprints are up in our dorm until I head home:


These will be accompanied by some glittery spiders, those stretchy faux spider webs and other such things. I will hopefully also get some black crepe paper to use around the house.

But for DIY (which I imagine you love as much as I do) here are a few selections that I can't wait to put into practice.

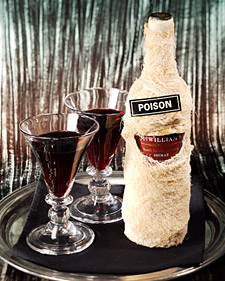
Martha (are you surprised?) has a bunch of great resources like these rat and mice templates to scatter around your floorboards and cabinets. Easy and very inexpensive, I might whip them up early! One of her other ideas is to transform a wine bottle, or in my case a 2 liter bottle of Dr. Pepper, into a convincing mummy:


Some eerily black poms a la Martha should also make an appearance. But the final touch that I am especially proud of? Let me tell you about it. (Perhaps this excitement stems from studying a chapter called "Uncanny" in my Literary Criticism class...)

On a site that I just recently stumbled upon, called Vintage Printable, you can print any variety of images free of charge and copyright restriction! Conveniently, many of the images are strange hand-drawn botanicals and even portraits. The best way to use these bizarre images? Replace your regular photos with something like the particularly detailed Hawaiian octopus study:


All in all, I expect a frightening but simple set up. I want it to look cool in the background, but you should know I'm not gonna slave over it!

Any ideas you know I would love? See anything that you are gonna try or have already? Fill me in!

16 October 2010

Halloween 2010: Brainstorm

Still don't have a costume picked out? Baffled by the array of scandalous interpretations of your favorite childhood characters? (I'm looking at you mini-skirt Little Red Riding Hood.)

My friends, your time is running out! So, in light of that, I've gathered together some of my favorite costumes with the hopes that if I can't inspire you to choose one, you can at least get a running start on your own idea!

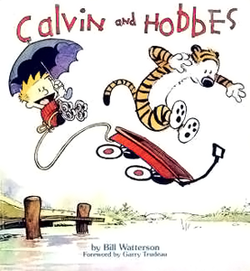
A couple of nerdy ideas to start you off with: how about going as Calvin and Hobbes?

(photo borrowed from wikipedia)

Not only is a pretty simple costume, but you can choose to either go solo or as a pair -- either you carry a stuffed tiger, or your have a friend dress up as one! Fun, right?

Or there is this fantastic option:


And it comes with a "Dress Like Flo" instructional website! Click on it to see exactly what she is wearing. Slick, eh?

One of the costumes that I have wanted to do forever is Marie Antoinette, with the costuming based on the movie starring Kirsten Dunst. The whole movie is beautiful, and the look from the masquerade is one of my favorites:

(This photo comes from Yahoo!)

And of course, you can be just about anyone if you throw a zombie in front of it.
My current favorite would be a Zombie Waldo! Whenever someone walked up to you, you could yell "You found me!" and give them some candy.

I just think I am soooo funny...

Any other ideas? We're getting down to crunch-time people! And I'm now working on two costumes! It's gonna be a wild ride.

(PS: Can someone be a brainstorm, literally, for Halloween? I just love the idea.)

15 October 2010

Teaching: Writing Your Bio

(or, How Not to Sound Like You Totally Think You're Awesome-sauce.)

In the very near future, I'll be a guest blogger on one of my favorite blogs. During my correspondence with the blogger, everything was simple and straightforward (and so nice!).

However, one little tidbit stopped me in my tracks: "... and include a short bio..." -- WHAT?!

Though I can write about things I've experienced and created without any issue, actually writing something about myself to give other people a taste of what I'm like is downright scary! If you are like me, even telling a classroom or meeting full of people about your favorite flavor of ice cream can be a little scary. And not only was I scared, but I was unsure: How do I write a bio that is short, succinct and maybe a little funny?

I procrastinated, wrote a little and then did some googling. Now, you can do that, or just read on! Here's 3 easy tips for writing a blip about yourself.

Be Honest: If your blog is a series of funny videos or webcomics, say that. Don't say that you "dally in intellectual ambiguities" or "debate the coherence of organic and gourmet foods". People will find out what you're really about, so sugar coating your blog (or yourself!) won't really trick anyone into reading for the long haul.

Write in 3rd-Person: It makes talking about how awesome you are seem less obnoxious. Most bios are written in 3rd person anyway, so you'll be catering to readers' notions of what a bio should be like.

Just do it! This seems kind of obvious, but waiting didn't make it any better. I just needed to get it down. So don't fuss over it -- write it, proofread, proofread again and then be done!

If you want some more resources for writing a great bio, I thought that the info from Chris Brogan was great, as well as Urban Muse's post on the subject.

Oh, you wanted to see mine? Here it is:
Stephanie is a third year college student, splitting her time between her laptop and sewing machine (and of course school and work!). When she’s not planning another do-it-yourself project, she catches up on what's new in the blog-world and regales readers with her latest creations and revelations via Real Fine Place. If you like clever projects, innovation and authenticity, she would love to meet you.

12 October 2010

Guest Post: Geeked Out!

Are you looking for a new blog to read? If you haven't already checked out my Regular Reads yet, then I would strongly to encourage you to head over and check out Geek in Heels to read my guest post!

(image borrowed from geek in heels)

In preparing for the birth of her very adorable little girl, Jenny at Geek in Heels put out a call for guest bloggers and I was more than happy to oblige! I've got a series of three posts about geeky Halloween ideas (right up the RFP alley, eh?) coming down the chute.


So check out my first post on geeky Halloween costumes, and stay tuned for the next two!

05 October 2010

Teaching: Bible Study

(As with all of the posts in the RFP Teaching series, it's important to remember that while I'm trying to share my knowledge with you, I by no means consider myself the be-all end-all of anything I know how to do. Just hoping some ideas and tips that I use can help you, too!)

First, let's be honest.

Who thinks that everything in the bible is simple and easy to understand at first glance? You don't? Good, me neither.

Studying your bible doesn't have to be a laborious affair with multiple translations or years of theological knowledge under your belt. But sometimes, verses just don't make sense the first time around. In light of that, I thought I would share a few things that I do to try and understand what God has to say to me a little easier.

Let's start at the very beginning:

Translation: Though you will obviously need a bible to study it, the important thing here is to buy a translation that you can read and understand well enough. I loved my NIV for as long I can remember, but then I recieved a copy of the God's Word translation, and for just plain reading, it's phenomenal. If you aren't sure, ask for recommendations from friends, or just pick one and go with it!

Then, 3 steps:

Reading: Before you get down to the nuts and bolts of the verse or section you are reading, read the entire section from beginning to end once. Sometimes, when you start by breaking a section or verse down, you miss the bigger meaning, and it can leave you confused. Don't worry if you don't get anything big from this: it also serves to give some context, background, to your study.

Rewrite: When there is a sentence or phrase that I get stuck on, I rewrite it in my own handwriting. Just copy it down. This is especially helpful for things like Psalms or Proverbs where there is a lot of content written in verse. A lot of the time, just rewriting it makes the sentence structure suddenly clear to me, and what seemed backwards just clicks.

Define: As much as context and rereading can tell you, sometimes, you have to get down and dirty with the dictionary. Often, the way I define a word will change, because I had one meaning in my head and that differed with the word that I found in the bible (and then double-checked in the dictionary). If that still has you stuck on a word, ask, uh... your local bible scholar?

For the first time, I've prayed for God to lead me through a study, and honestly, I've been getting so much out of each and every verse its unbelievable. That's my last recommendation: pray about it.

So here's a challenge: take your own study methods, take mine or take someone elses and study something. Did you like it, do you understand the verse better? Tell me about it!

04 October 2010

Halloween 2010: Haunted House

Hiya friends!

For each of the categories that I'm writing on related to Halloween (food, costumes and decor, approximately) I wanted to start with a post that detailed what I've done in the past. Unfortunately, I have to report that as far as decor is concerned, I haven't done much more than stretch a few dollar store cobwebs! I guess we have some spiderweb outdoor lights, but the inside of the house has been pretty bleak.

So for decor, we're skipping straight to ideas and inspiration. Isn't that the fun part anyway?

For Halloween decorations, there are essentially three options: creepy, cheesy or classy.
I'm leaning towards a mix of creepy and classy. But really, who am I kidding? I'll have all three with a healthy helping of cheese!

Here's what the cat dragged in for each of the three:

Creepy: You get some gross stuff with this option!

A grotesque tablescape, roaches come with no extra charge.
You might want to avoid this if you have squeamish guests! If you like it, see these specimen lanterns or dissection favor bags.

Cheesy: Your traditional decorations;
Cutesy tablecloth and lanterns can surround your candy offerings, too. But spiders, angry black cats, pumpkins and fake cobwebs are ideal here.

Classy: Eerie, but stylish, too.

These sparkly skulls are quite the representatives of that, eh?
This relies on subtle changes to your every day decor (like diy silhouettes), and of course, glitter.

Anyone else notice the excessive alliteration in this post? Weird, and unintentional, believe you me. Are you a fan of decorating the house or would you rather just get yourself all dolled up?